Your wedding invitation isn’t just a mailer; it’s the most critical branding document for your event, designing the guest experience long before the day itself.
- Every element, from the texture of the paper to the RSVP method, is a strategic choice that shapes guest perception and anticipation.
- Progressive theme unveiling across the entire stationery timeline creates a narrative journey, turning passive recipients into engaged participants.
Recommendation: Treat your stationery as the first chapter of your wedding story, not a functional appendix. This shift in mindset transforms an informational item into an experiential one.
For most couples, the wedding invitation has a simple job: convey the who, what, where, and when. It’s a logistical tool, a piece of paper designed to deliver critical information. This functional view leads to decisions based on budget and basic theme-matching—choosing a font that looks “formal” or colors that mirror the bridesmaids’ dresses. While practical, this approach misses the single greatest opportunity in wedding planning: the chance to direct the opening scene of your event’s story.
An invitation suite is far more than data. It’s the first tangible piece of your wedding that a guest will hold. It’s a sensory preview, a tactile promise of the atmosphere you are crafting. Viewing it as a mere announcement is like believing a movie trailer’s only job is to list the showtimes. The real power lies in its ability to build a world, establish a tone, and create an emotional investment that begins the moment the envelope is opened. It’s not just an invitation; it’s an overture.
But what if the key to an unforgettable wedding wasn’t just in the day-of details, but in the narrative cohesion you build for months beforehand? This guide reframes the invitation suite from a checklist item to an experiential blueprint. We will deconstruct each component not as a separate choice, but as a strategic touchpoint in a masterfully sequenced brand experience. We will explore how to use paper, typography, and even the RSVP process to immerse your guests in your wedding’s unique narrative, transforming them from attendees into active, excited participants before they even mark their calendars.
This article provides a strategic blueprint for transforming your stationery from a simple notice into a powerful tool for building anticipation. Follow along as we dissect each element to maximize its narrative impact.
Summary: A Strategic Blueprint for Your Wedding Stationery
- Custom Spot Calligraphy or Commercial Font: Which Is More Authentic?
- Why the Envelope Liner Is the Most Underrated Design Real Estate?
- Website URL or Physical Card: Which Gets Faster Responses?
- Are Custom Watercolor Maps Actually Useful for Navigation?
- How Long Does It Take to Assemble and Stuff 100 Multi-Card Suites?
- How to Unveil Your Theme Progressively From Invite to Exit?
- Why Vinyl Wraps Fail on Uneven or Carpeted Surfaces?
- When to Send Save-the-Dates to Avoid Guest Confusion and No-Shows?
Custom Spot Calligraphy or Commercial Font: Which Is More Authentic?
The choice between custom calligraphy and a commercial font is often framed as a battle between heartfelt authenticity and practical budget. However, from a strategic standpoint, it’s about defining the very voice of your event. A commercial font, no matter how elegant, speaks with a universally recognized tone. Custom calligraphy, in contrast, is your personal signature—an immediate, tangible sign that a human hand has crafted this experience. It communicates a level of care and intention that a digital typeface cannot replicate. This is especially true for the guest’s first point of contact: the envelope.
The financial investment reflects this difference in impact. A professional calligrapher creates a piece of art for each guest, and pricing often reflects this bespoke service. For instance, a pricing guide for 2026 shows that costs can range from $4.50 to $6 per envelope for custom calligraphy, a figure that represents an investment in a highly personal first impression. This cost is not just for the ink and labor; it’s for the immediate signal of a bespoke, high-touch event.
Yet, the most visionary approach is often a hybrid one. You can deploy custom calligraphy strategically for maximum emotional impact—on names and headers—while using a complementary, highly readable commercial font for the finer details. This blend offers the best of both worlds: the personal, artistic touch that conveys authenticity, and the clean legibility that ensures a frictionless experience for your guests. A Miami-based couple planning a bohemian wedding perfectly executed this by pairing modern brush calligraphy on their envelopes with a simple font for the details card, creating a relaxed yet elevated vibe that guests cherished.
Your 5-Point Font Authenticity Audit
- Assess Wedding Formality: Does your traditional or church setting demand the gravitas of a classic serif font, or does a modern, relaxed venue call for a more personal, hand-lettered feel?
- Evaluate Cognitive Friction: Test your chosen script font. Can it be read effortlessly at a glance, or does its ornate nature create a barrier to understanding for guests of all ages?
- Match Font to Feeling: Does the typeface evoke the right emotion? A rustic, natural font should feel at home with a barn venue, while a sleek sans-serif aligns with a modern art gallery.
- Deploy Artistry Strategically: Reserve true calligraphy or highly decorative fonts for the most impactful elements, like your names, to make them special without sacrificing overall readability.
- Conduct a Legibility Test: Print a sample. Ask someone unfamiliar with your wedding to read it. If they stumble on any detail, from the time to the address, your font choice needs refinement.
Why the Envelope Liner Is the Most Underrated Design Real Estate?
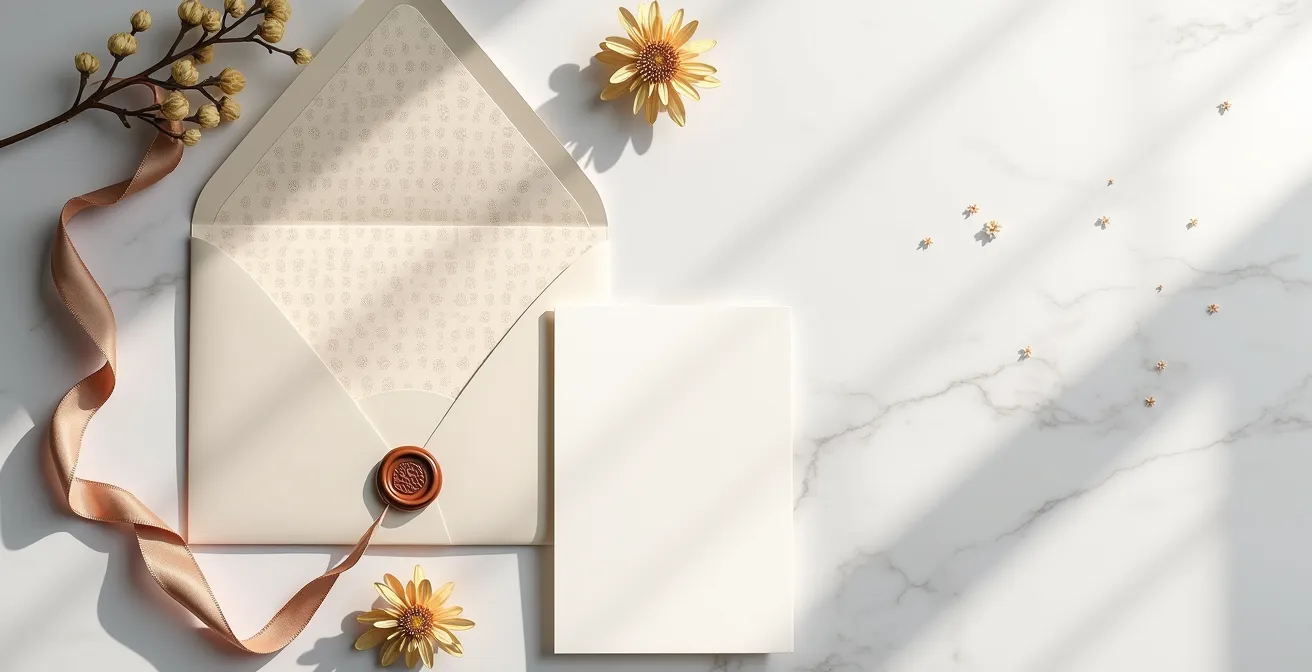
The envelope liner is the stage curtain of your invitation suite. It’s a design element that exists for only a fleeting moment—the time between breaking the seal and revealing the main card—but its impact is immense. To neglect the liner is to waste the most valuable piece of design real estate in the entire stationery experience. It’s the first flash of color, the first hint of pattern, the first unexpected detail that signals to your guest: “Pay attention. This is different. This is special.” It transforms the functional act of opening mail into a moment of discovery and delight.
Strategically, the liner serves as a narrative bridge. It can introduce a core motif or a secondary color from your palette that will appear later in the day-of decor. This subtle foreshadowing begins the process of thematic immersion, creating a sense of cohesion and thoughtful planning. Whether it’s a botanical pattern hinting at a garden ceremony or a sleek geometric design for a modern affair, the liner sets an immediate and powerful tone. It says you’ve considered not just the information, but the very experience of receiving it.
This powerful touchpoint is surprisingly accessible. A wedding stationery pricing analysis reveals the cost is around $2.15 per printed liner, with assembly adding a couple of hours for 100 units. This is a modest investment for an element that dramatically elevates the entire suite from a simple card to a packaged, curated experience. It’s the difference between being handed a note and unwrapping a gift.
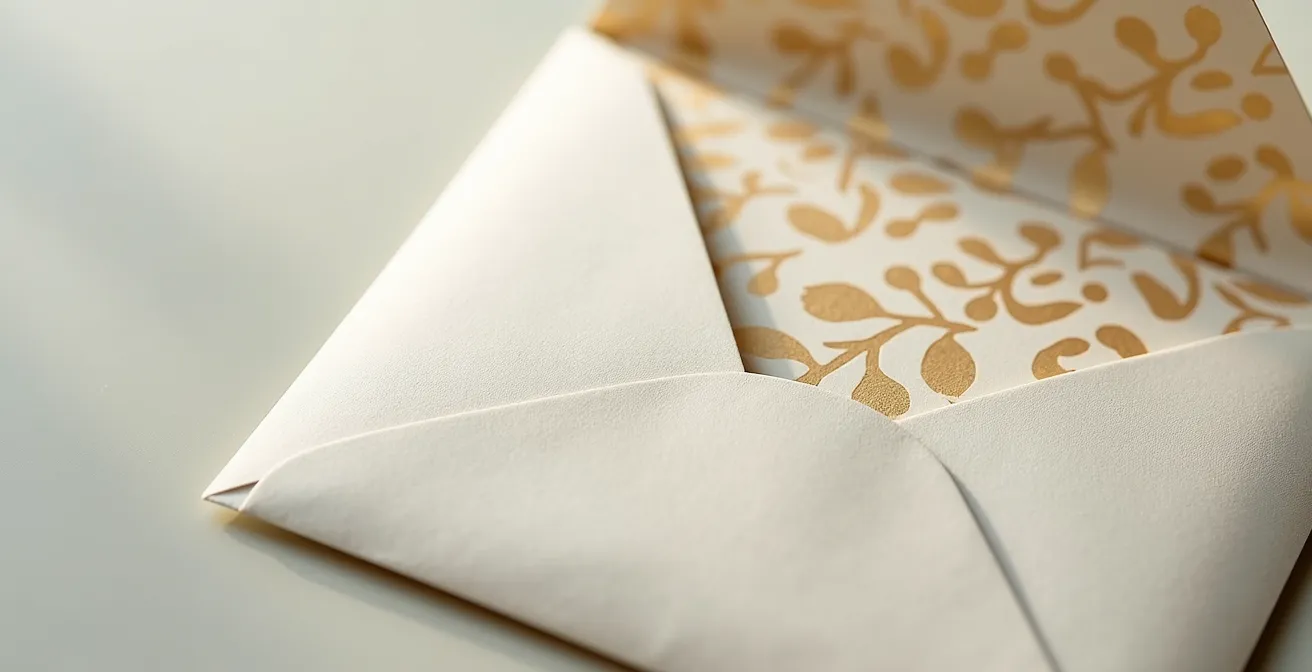
As this close-up reveals, the liner is an opportunity for texture, pattern, and subtle luxury. It’s a canvas for a design element that might be too bold for the main invitation, offering a “wow” moment that builds immediate anticipation for what’s inside. It’s a testament to the idea that in luxury design, no surface is unimportant.
Website URL or Physical Card: Which Gets Faster Responses?
The debate between digital and physical RSVPs is often centered on tradition versus modernity. However, the strategic question isn’t about which is “better,” but which best serves your guests and your planning needs. The method you choose directly communicates the tone of your event and influences the guest’s experience. A QR code or URL offers immediacy and efficiency, signaling a modern, streamlined event. A physical mail-back card, complete with a stamp, evokes a sense of formality and tradition, turning the RSVP into a tangible, thoughtful act.
While digital responses are undeniably faster in terms of data collection, “faster” doesn’t always mean a better experience or a higher response rate without follow-up. The key is to minimize cognitive friction for your specific guest list. For a tech-savvy crowd, scanning a QR code is effortless. For older relatives or those less comfortable with technology, the process can be a frustrating barrier, leading to delays and the need for manual follow-ups. A physical card, while slower in transit, presents a clear, single-task action that is universally understood.
The most effective strategy often lies in a hybrid system, offering both a URL and a physical card. This accommodates all guest demographics, demonstrating thoughtful hospitality. It respects tradition while providing modern convenience. The choice itself becomes part of your event’s brand: are you exclusively modern, deeply traditional, or inclusively flexible?
This comparative table breaks down the core trade-offs, providing a clear framework for deciding which method aligns best with your event’s strategic goals. As a comparative analysis of invitation options highlights, the optimal choice depends entirely on your specific guest demographics and planning priorities.
| Method | Response Speed | Cost | Guest Experience | Best For |
|---|---|---|---|---|
| QR Code/URL | Immediate | $0-50 | Instant data tracking | Tech-savvy guests |
| Physical Card | 2-3 weeks | $2-5 per card | Tangible keepsake | Traditional/older guests |
| Hybrid System | Varies | $1-3 average | Flexible options | Mixed demographics |
Are Custom Watercolor Maps Actually Useful for Navigation?
To ask if a custom watercolor map is useful for navigation is to miss its primary purpose entirely. A guest will not use your beautifully illustrated map to get turn-by-turn directions; they have a GPS for that. The watercolor map’s function is not practical, it’s emotional navigation. It’s a narrative tool, a charming and personal guide to the *world of your wedding*, not the literal roads leading to it. It orients the guest within the story you are telling.
A great watercolor map highlights landmarks that are meaningful to your story—the café where you had your first date, the park where you got engaged, the scenic route between the ceremony and reception. By labeling these locations with romantic descriptions rather than just street names, you transform a geographical area into a personal landscape. This act of curation tells your guests that the journey is as important as the destination, and that every detail of their experience has been considered.
The case of a destination wedding in Cairo provides a perfect example. The couple used custom illustrations of the pyramids in their invitation design. This didn’t help guests navigate the streets of Cairo, but it did something far more important: it instantly evoked the unique, epic, and eye-catching atmosphere of the location. The map served as an emotional anchor, setting a tone of grand adventure. It’s a strategic choice that shifts the guest’s mindset from “how do I get there?” to “what will this feel like?”
Ultimately, the map is a keepsake. It’s a piece of art that guests can hold onto, a beautiful memento that tells a small part of your story. In this sense, its “usefulness” extends far beyond the wedding day, becoming a piece of your shared history. When designing it, consider it as future wall art, a beautiful and lasting symbol of the journey you invited your guests to share.
How Long Does It Take to Assemble and Stuff 100 Multi-Card Suites?
The time it takes to assemble an invitation suite is the hidden cost of a multi-piece design. A simple card and envelope might take an hour, but a suite with a liner, main invitation, details card, RSVP card, and belly band is a significant logistical undertaking. Couples often underestimate the “soft cost” of their own labor, viewing DIY assembly as a free alternative to professional services. Strategically, however, your time is a valuable, non-renewable resource in the final months of wedding planning. The question isn’t just “how long will it take,” but “is this the best use of my time?”
The process is more than just stuffing envelopes. It involves a precise sequence: layering cards in the correct order, neatly wrapping them with a band or ribbon, inserting them into the lined envelope without creasing, sealing, and stamping. For 100 suites, this meticulous, repetitive work can easily consume 8 to 12 hours of focused effort. An “assembly party” with friends can cut this time in half, but it introduces variables in quality control and can turn a fun get-together into a stressful production line.
Hiring a stationer or a dedicated assembly service offloads this entire process. While it comes with a hard cost, it guarantees professional, consistent quality and, most importantly, frees up your time and mental energy for other critical planning tasks. It’s an investment in peace of mind.
The following table provides a clear breakdown of the trade-offs between different assembly methods. As outlined in a cost analysis of wedding stationery options, the “free” option of DIY assembly carries a significant, often overlooked, time commitment.
| Assembly Method | Time Required (for 100) | Monetary Cost | Quality Control |
|---|---|---|---|
| DIY Assembly | 8-12 hours | $0 (labor only) | Variable, prone to error |
| Assembly Party | 4-6 hours with helpers | Wine & snacks ($50-100) | Moderate, can be fun |
| Professional Service | 0 hours for couple | $300-500+ | Consistent, guaranteed |
How to Unveil Your Theme Progressively From Invite to Exit?
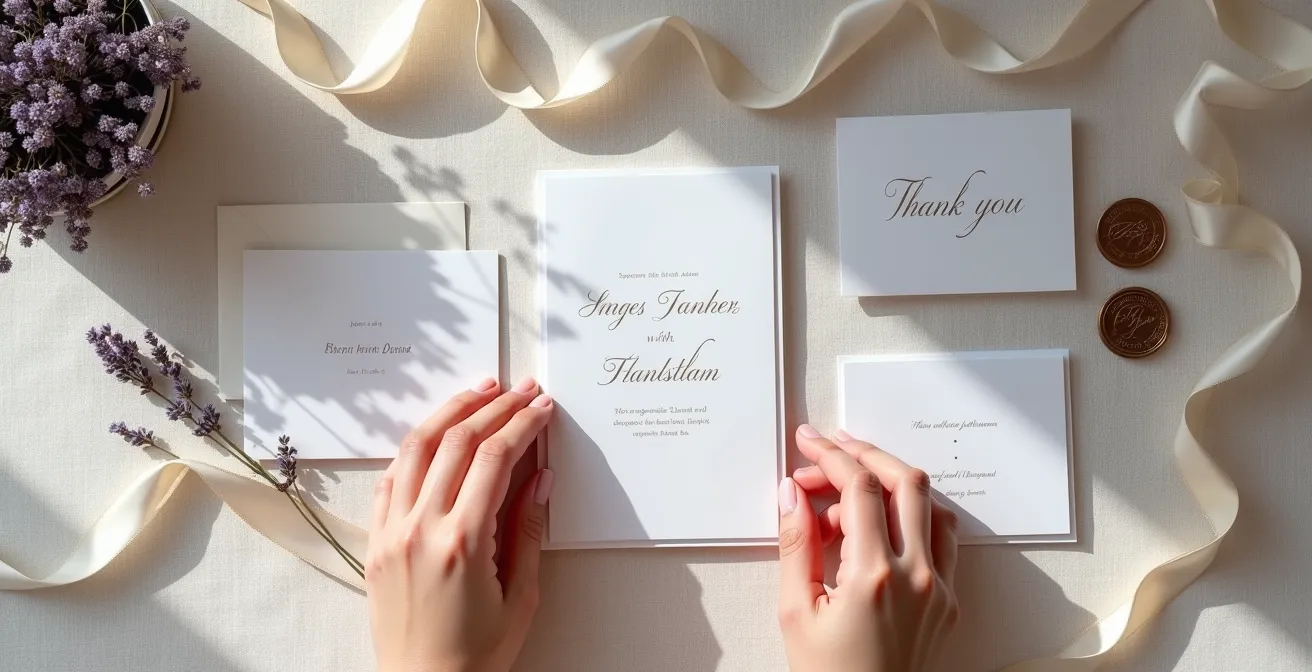
A truly visionary wedding brand doesn’t reveal its entire theme on the main invitation. Instead, it practices narrative cohesion, progressively unveiling design elements across a series of touchpoints, from the first save-the-date to the final thank-you card. This strategic sequencing builds anticipation and creates a deeply immersive experience. Each new piece of stationery your guest receives should feel like turning a page in a story, revealing a little more of the world you are building. It’s the difference between showing a movie poster and releasing a series of compelling trailers.
The process begins with the save-the-date, which acts as a teaser. It should introduce a primary color and a single, simple motif—a hint of what’s to come. The main invitation is the full reveal, where all the design elements—typography, patterns, textures, and colors—come together in harmony. The wedding website then expands this world with photo galleries and detailed stories. This narrative thread must then be carried through to the wedding day itself, with day-of signage, programs, and menus echoing the invitation’s design language. Finally, the thank-you card serves as the epilogue, returning to an intimate tone with a simplified version of the core design, bringing the story to a satisfying close.
As a case study in progressive theme building, a designer’s ‘Ornate Vines’ suite, highlighted by the experts at Paperless Post, is a masterclass. It began with a subtle, blind-embossed vine border on a die-cut card, hinting at architectural details and bridal gown lace. This motif was then expanded upon in day-of materials, creating a cohesive and elegant atmosphere that felt intentional from start to finish.
This sequential approach requires foresight and a clear vision. The following timeline outlines the key touchpoints for a progressive theme reveal:
- Save-the-Date (6-8 months prior): Introduce the primary color and a basic motif or typographic style. This is the first whisper of your theme.
- Main Invitation Suite (2-3 months prior): Fully develop the theme. All design elements (fonts, colors, patterns, paper) should work in concert to tell your story.
- Wedding Website: Act as a digital hub to expand the narrative with more photos, details about your story, and logistical information.
- Day-of Signage (Wedding Day): Echo the invitation’s design in welcome signs, seating charts, and programs for visual consistency.
- Reception Details (Wedding Day): Carry key motifs through to menus, place cards, and table numbers, ensuring every detail feels connected.
- Thank You Cards (Post-Wedding): Conclude the narrative. Return to a more intimate tone, often using a simplified version of the main invitation design.
Why Vinyl Wraps Fail on Uneven or Carpeted Surfaces?
On the surface, this question seems purely technical, a matter of adhesives and materials relevant only to dance floor designers. But its lesson is a powerful metaphor for wedding branding as a whole: material honesty. A vinyl wrap fails on carpet because it is the wrong material for the surface. It is an attempt to force a smooth, slick identity onto a soft, textured foundation. The wrap bubbles, peels, and ultimately fails because it is not authentic to its environment.
This is precisely what happens when your wedding’s “brand” is misaligned with its execution. Using a hyper-modern, minimalist digital invitation for a traditional, black-tie church wedding creates the same kind of dissonance. Sending a rustic, kraft-paper suite for a lavish ballroom affair is equally incongruous. The “material” of your message—the paper, the font, the delivery method—must be authentically suited to the purpose and tone of the event itself. When it isn’t, the message fails, just like vinyl on carpet.
A vinyl wrap fails on carpet because it’s the wrong material for the surface. The lesson is to choose materials that are authentically suited for their purpose, from the paper to the floor.
– Wedding Design Professionals
The solution, both for floors and for branding, is not to force an ill-fitting material but to choose one that works in harmony with the existing surface. Instead of fighting the carpet, one could use elegant area rugs that complement the aesthetic or use custom gobos to project patterns onto any surface, adapting to the environment rather than fighting it. This principle of choosing the right tool for the job is the essence of strategic design.
For those facing the literal challenge, here are several surface-appropriate alternatives that demonstrate this principle of material honesty:
- Custom-lit Gobos: Projecting light-based patterns or monograms that can be displayed on any surface, from walls to floors, regardless of texture.
- Elegant Area Rugs: Choosing rugs that align with the invitation’s aesthetic to define a space without adhesives.
- Removable Carpet Tiles: Sourcing carpet tiles with custom designs that can be laid over existing carpet for a temporary, seamless look.
- Elevated Platforms: Implementing raised platforms with smooth surfaces where a vinyl wrap can be successfully and safely applied.
Key Takeaways
- Your Invitation is a Brand Experience: Shift your mindset from information delivery to experiential storytelling. The invitation suite is the first and most critical touchpoint in your wedding’s brand narrative.
- Every Detail Communicates: From the texture of an envelope liner to the choice of an RSVP method, every element sends a message about the tone, formality, and care invested in your event.
- The Story Extends Beyond the Card: A cohesive guest experience is built over time. Use a progressive reveal from the save-the-date to the thank-you card to create a compelling and immersive story.
When to Send Save-the-Dates to Avoid Guest Confusion and No-Shows?
The timing of your save-the-date is your first strategic move in guest management. Sending it too early can cause it to be forgotten; sending it too late defeats its purpose entirely, especially for guests who need to travel. The optimal timeline is not a one-size-fits-all rule but a tiered strategy based on guest location. This demonstrates a high level of consideration and ensures your guests have ample time to plan, minimizing the confusion and last-minute cancellations that lead to no-shows.
For destination or international weddings, the save-the-date is a critical planning document. It should be sent at least 12 months in advance. This gives guests the necessary runway to request time off work, save money, and book favorable travel and accommodation rates. For domestic guests traveling from out-of-state, a 9-12 month window is appropriate. For local guests, 6-8 months is the standard, giving them plenty of notice without being so far in advance that the date gets lost.
This tiered approach is a hallmark of a well-executed event strategy. It acknowledges the different levels of commitment required from your guests and provides them with the tools they need to participate fully. It’s an act of hospitality that precedes the event itself, setting a tone of care and organization that builds guest confidence and excitement.
The following timeline, informed by expert recommendations on wedding stationery timelines, provides a clear, tiered approach to ensure every guest, regardless of their location, receives information in the most helpful and timely manner possible.
| Guest Location | Save-the-Date Timeline | Invitation Timeline | RSVP Deadline |
|---|---|---|---|
| International | 12+ months before | 12 weeks before | 6 weeks before |
| Domestic (Out-of-State) | 9-12 months before | 10 weeks before | 4 weeks before |
| Local Guests | 6-8 months before | 8 weeks before | 3 weeks before |
Begin crafting your guest experience today by treating your invitation not as a task, but as the first, most defining act of your wedding story. This strategic shift is where a good wedding becomes an unforgettable one.
Frequently Asked Questions About Wedding Invitation Strategy
When should guests RSVP by for optimal planning?
You should set your RSVP date three to four weeks prior to your wedding. This buffer gives you enough time to follow up on any missing responses before you are required to give final headcounts to your caterer and other vendors.
How can digital RSVPs improve response tracking?
Digital formats like wedding websites or QR codes offer integrated RSVP tracking systems. This provides instant delivery confirmation and makes it easy to send automated reminders or updates, though they do lack the tangible keepsake value of a physical card.
What percentage of guests typically need RSVP follow-up?
Across the industry, it is standard to expect that around 15-20% of your guests will require a follow-up reminder after the RSVP deadline has passed, regardless of whether you choose a digital or physical response method.